
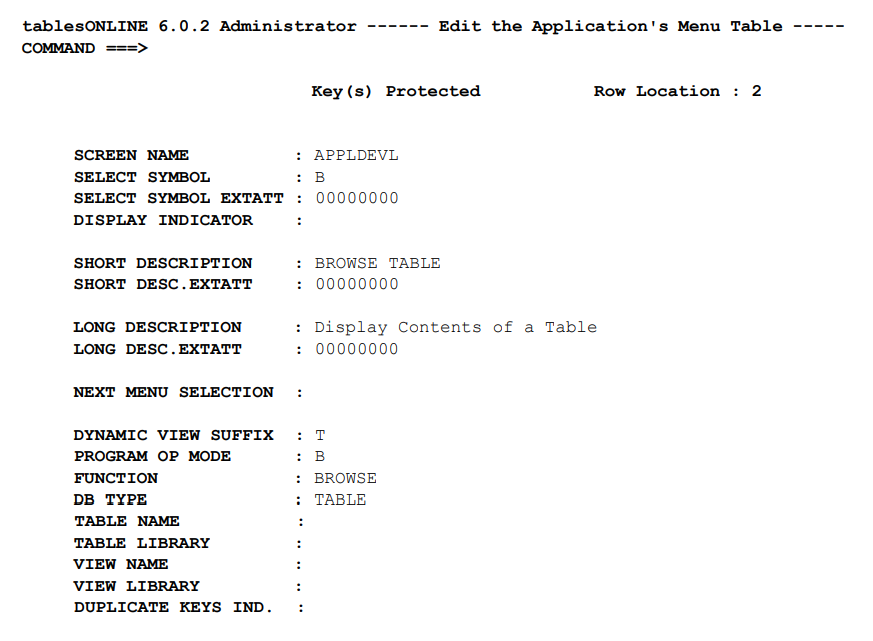
In this example using the S line command, we have selected the BROWSE TABLE function (Select Symbol B) to be modified.
The screen is divided into sections. The first group of fields (from Screen Name to Long Description) determine menu organization and display descriptions. The second group (beginning with Next Menu Selection) control the flow of your application. The content of the screen will vary depending on what you enter in the Dynamic View Suffix field.
The first two fields on this screen make up the key for the menu table. This table does not allow duplicate keys. This ensures that the select symbol for each row in a table is unique. When creating or editing menu rows, use the fields described in Table 168. A brief description of each field is provided.
|
Field Name |
Description |
|---|---|
|
Screen Name |
This field contains the name of the screen that contains the menu row to be edited. The screen name may be up to eight characters in length. |
|
Select Symbol * |
This field contains the symbol that will be used to select the row from the menu. The select symbol may be up to four characters in length. |
|
Display Indicator |
This field indicates whether or not the row will be displayed on the menu. This field may be set to Y for yes, display the row, or N for no, do not display the row. The default value is Y. |
|
Short Description * |
This field contains a brief description of the menu function. |
|
Long Description * |
This field contains a long description of the menu function. |
|
Next Menu Selection |
This field indicates what action is to be taken on return to a menu after this particular selection has been made and completed. If this field is blank, the menu is re-displayed. If you wish to perform another function on return to the menu, insert the select symbol for another row in the menu into this field. If the value CICS is inserted in this field, the user is sent back to native CICS on completion of the menu choice. If this is done for a menu entry that has been assigned as a user’s starting menu option in the Application Control Table, that user can only execute the process defined for that menu entry before being logged out. This can be used to restrict a user to a single function, such as browsing a particular table. |
Dynamic View Suffix
From a tablesONLINE menu, control may be passed to one of the following:
- the tablesONLINE Table Editor for editing or browsing tables, or for table definition
- another tablesONLINE menu
- a Utility Function
- another CICS program or a CICS transaction
Each of these transfer types requires a different set of parameters, yet each type of transfer is controlled by entries in a single menu table.
The Dynamic View Suffix is used to specify the type of transfer to be performed. The balance of the fields that will appear in this screen will depend on the value placed in the Dynamic View Suffix field. This field may be set to the values listed in Table 169.
|
Field Value |
Transfer To |
|---|---|
|
T |
Table Editor |
|
M |
Menu |
|
S |
Utility |
|
(blank) |
CICS Program/CICS Transaction ID |
Table Editor (T)
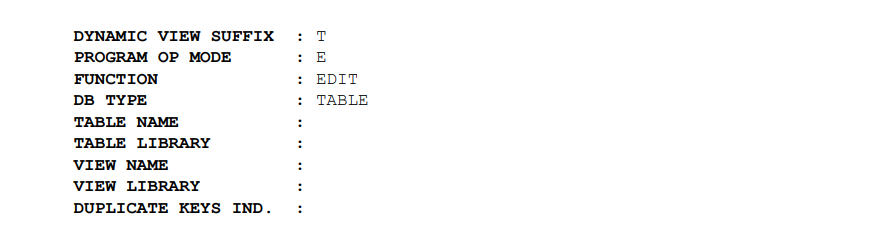
Program Opening Mode
This field is used to control which tables (Data or View) are opened and whether they are opened for read or write access. Editing and browsing operations, for example, invoke the same program but with different program opening modes. For editing, the table is opened with a program opening mode of E (open for write) and for browsing the table is opened with a program opening mode of B (open for read). The program opening mode values are listed in Table 170.
|
Mode |
Usage |
|---|---|
|
B |
Browse Data Table |
|
E |
Edit Data Table |
|
C |
Browse View |
|
D |
Edit View – display order |
|
L |
Edit View – row layout |
|
U |
Utilities |
The editor uses different sets of Views depending on whether it is operating on a Data Table (mode B or E), a View (mode C, D or L) or a Utility (mode U).
Function and DB Type
The FUNCTION and DB TYPE fields are used by the Editor as components of keys for lookups in the HELP and the DESCription tables. See the sections below on editing the HELP and DESCription tables for details.
Table Name and Table Library
These fields can be used to restrict a user to a particular table or library. If a table name is provided, then executing the menu entry opens the Editor with that table. In this case, the user cannot select any other table. If a library name is provided, executing the menu entry will open the Identify Table screen where the user may select any table that is stored on that library. In this case, the user does not have access to tables in any other library.
If these fields are left blank, the last table accessed is used as a default value in the Identify Table screen. It may then be changed to another library and table by the user. These fields may or may not be displayed on the Identify Table screen. This will depend on how the Display Table Name and Display Library Indicator fields in the Application Control Table for the user and application have been set.
View Name and View Library
These fields are used to specify the View and/or View library that is used to edit the table specified above. If you wish to use a View other than the one that is defined with the same name as the Data Table, insert the View name in this field. If this field is blank, the View name used for the edit will be the one with the same name as the Data Table. If you wish to use a View in a different library, enter the name of that library.
The ability to specify the use of a particular View of a table for a menu item allows you to provide a user with access only to the required fields in the table. This may be desirable in cases such as personnel tables containing employee records. Using this feature, it is possible to display only the necessary fields to the user.
Duplicate Keys Indicator
The Duplicate Keys Indicator field here interacts with the Duplicate Keys Allowed? field in the View for the table being edited. The following describes how these fields work together. If:
- the table is hashed;
- the View has N for duplicate keys; or
- the menu has N for duplicate keys
then:
- duplicate keys are not allowed and the user cannot change this, for the Duplicate Keys Allowed? switch does not appear on the Table Identification screen.
Otherwise:
- the Duplicate Keys Allowed field appears on the table identification screen;
- the Duplicate Keys Indicator menu controls the initial setting of the Duplicate Keys Allowed? switch in Table 171 and the user may alter the setting.
|
Indicator Setting |
Duplicate Keys Allowed? |
|---|---|
|
(blank) |
N |
|
Y |
Y |
Menu (M)

Transfer Menu
This field indicates the name of the menu to which control will be passed by this menu item. tablesONLINE searches the menu table using the Transfer menu field as a key and builds the next menu from the items with a screen name matching that key.
Transfer Menu Symbol
This field may contain a Transfer menu Symbol, the selection symbol for a particular entry in the transfer menu. If this field is blank, the menu specified in the Transfer Menu field is displayed and a user may make a selection from that menu. If an entry is made in the Transfer Menu Symbol field, it is treated as a selection from the menu specified in the Transfer menu field and that entry is executed.
Through successive use of such options, it is possible to nest menus indefinitely. To return from a subordinate menu to the calling menu, press <End> or <PF12>.
Utility (S)

The transfer to a tablesONLINE utility is actually a transfer to the Table Editor with all of the editor transfer parameters set by tablesONLINE – to values appropriate for a particular Utility function.
A program opening mode of U indicates this is a Utility and the function field indicates which one.
Table 172 is a list of the supported utility functions.
|
Utility Function |
Description |
|---|---|
|
CHG PSWD |
Change either the read or write password. |
|
COPY |
Copy a table to the same or a different library. |
|
CPY APPL |
Copy all the Applications Control Table. |
|
CPY VIEW |
Copy a View to the same or a different library. |
|
CREATE |
Create or edit an Alternate Index. |
|
DEF TBL |
Edit tableBASE table definition (DT Block). |
|
DEL |
Delete a generation of a table. |
|
DEL VIEW |
Delete a View table. |
|
EDITSUPL |
Enter supplementary information for View. |
|
GENCOPYB |
Generate copybook from View table. |
|
PRTTABLE |
Print a table. |
|
PRTVIEW |
Print a View table. |
|
RENAME-D |
Change the Data Table name. |
|
RENAME-V |
Change the View name. |
|
RESTRUCT |
Restructure data in a table. |
|
WPROT VW |
Place a write password on a View. |
|
XED PROF |
Edit your User Profile. |
The best way to set up menu items that call a tablesONLINE Utility is to start with an existing menu table such as TBOLMENU. Create a copy of the desired menu item in TBOLMENU (follow the procedure outlined in To Add a New Menu Item) and simply change the Menu Name of the copied item to the name of your menu table. You can also modify any unprotected fields such as Select Symbol and Short Description. A copy of the menu item that calls the desired tablesONLINE utility has now been created in your Menu table. This procedure ensures that the Utility is called correctly.
Blank Program/Transaction ID

Transfer Program
Enter the name of the program that is to be invoked by the menu item, in the Transfer Program field. Specifying a program name in the Transfer Program field causes that program to be invoked by a CICS XCTL (transfer control) command. If this field is blank, the transaction that is specified in the Transfer Transaction field, described below, is started.
Retain Environment
This field only applies to transfers to programs, rather than transfers to transactions. If it is set to Y, the called program receives a 4096 byte DFHCOMM area. Otherwise, the called program receives only the first 20 bytes that contain session identification information:
01 DFHCOMMAREA.
             05 SESSION-IDENTIFICATION    PIC X(8).
             05 PROGRAM-IN-PROCESS        PIC X(8).
             05 SUBPROGRAM-IN-PROCESS     PIC X(1).
             05 FILLER                    PIC X(3).
To return to tablesONLINE at exactly the point of transfer, the called subroutine must issue a CICS XCTL call to TBDKAPPL with a DFHCOMMAREA of exactly 20 bytes with the following format:
01 DFHCOMMAREA.
             05 SESSION-IDENTIFICATION    PIC X(8).
             05 MESSAGE-KEY               PIC X(7).
             05 NEW-SESSION-IND           PIC X(1).
             05 FILLER                    PIC X(3).
             05 PROGRAM-RETURN-CODE       PIC S9(4) COMP.
The Session-Identification field must be returned exactly as it was passed. Provisions are also made to return a condition code and a 7 byte message key. If the message key is non-blank, tablesONLINE will attempt to retrieve a message from the message table. When the message key is non-blank, the PROGRAM-RETURN-CODE must be zero, otherwise control will be returned to the transfer program.
Normally the NEW-SESSION-IND is blank when returning to the point of transfer, however a Y in this indicator causes tablesONLINE to set up a new window. A + or – in this indicator, along with a PROGRAM-RETURN-CODE of -1, causes tablesONLINE to attempt to move to another window created either before or after the one you are currently in.
Transfer Transaction
Enter the name of the transaction that is to be invoked by the menu item. If this field is completed, the Transfer Program field must be blank.
Transfer Parameters
A non-blank transfer parameter causes tablesONLINE to mimic terminal input when a transfer transaction is started. This allows a form of parameter passing to CICS applications that expect to find data on the screen. For example, to start a tablesONLINE application where the following is entered on the terminal,
-
TBOLPAYRUSER1,
TBOL is the transfer transaction and PAYRUSER1 represents the application ID and user ID and is entered as the transfer parameter. Similarly, a CEMT transaction could be started with ‘INQUIRE PROGRAM(TB*)’ as the TRANSFER PARAMETER.